How to Temporarily Disable Your Antivirus Software: A Step-by-Step Guide
Antivirus software is essential for protecting your computer from malicious threats, but sometimes it can interfere with legitimate software installations.
If you’re experiencing issues with false positives while installing or playing repacked games from Repack Guru, temporarily disabling your antivirus may be necessary.
Follow this step-by-step guide to learn how to safely and temporarily disable your antivirus software.
Important Note: Only disable your antivirus when you are sure that the file or program you are running is safe. Always re-enable your antivirus after completing the installation.
Step-by-Step Guide
1. Identify Your Antivirus Software
First, determine which antivirus software you are using. This guide covers the most popular antivirus programs: Windows Defender, Avast, Norton, and McAfee.
2. Disabling Windows Defender
For Windows 10 and 11:
-
Open Windows Security:
- Press
Win + Ito open Settings. - Go to Update & Security.
- Click on Windows Security.
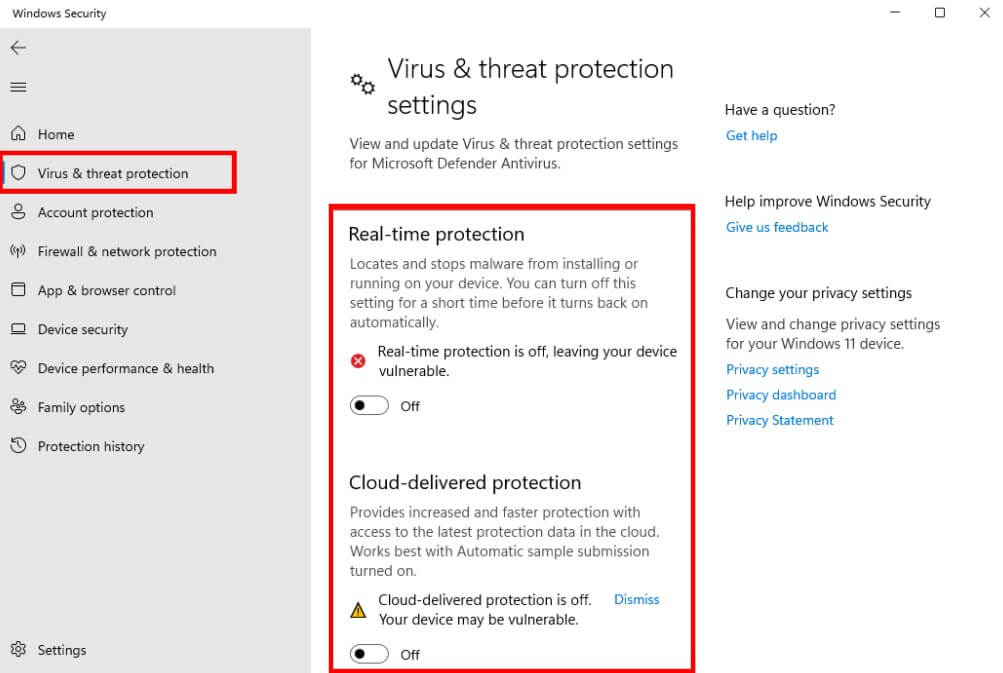
- Click on Virus & threat protection.
- Press
-
Manage Settings:
- Under the Virus & threat protection settings section, click on Manage settings.
-
Turn Off Real-Time Protection:
- Toggle the switch under Real-time protection to Off.
- Confirm if prompted.
Re-enabling Windows Defender:
- Repeat the above steps and toggle Real-time protection back to On.
3. Disabling Avast Antivirus
-
Open Avast:
- Right-click the Avast icon in the system tray (bottom-right corner of the screen).
- Select Avast shields control.
-
Select Duration:
- Choose the duration for which you want to disable the shields (e.g., Disable for 10 minutes, 1 hour, until computer is restarted, or permanently).
-
Confirm:
- Confirm by clicking Yes if prompted.
Re-enabling Avast:
- Open Avast again and select Enable all shields.
4. Disabling Norton Antivirus
-
Open Norton:
- Right-click the Norton icon in the system tray.
- Select Disable Auto-Protect.
-
Select Duration:
- Choose the duration for which you want to disable the protection (e.g., 15 minutes, 1 hour, 5 hours, or until system restart).
-
Confirm:
- Click OK to confirm.
Re-enabling Norton:
- Right-click the Norton icon again and select Enable Auto-Protect.
5. Disabling McAfee Antivirus
-
Open McAfee:
- Right-click the McAfee icon in the system tray.
- Select Change settings > Real-time Scanning.
-
Turn Off Real-Time Scanning:
- Click Turn Off.
- Select the duration (e.g., 15 minutes, 30 minutes, 45 minutes, or 60 minutes).
-
Confirm:
- Click Turn Off again to confirm.
Re-enabling McAfee:
- Right-click the McAfee icon again and select Turn On.
Final Steps
After you’ve temporarily disabled your antivirus software, proceed with the installation or launch of your game. Remember to re-enable your antivirus software immediately afterward to ensure your system remains protected.
Conclusion
Temporarily disabling your antivirus software can help bypass false positives that interfere with game installations. Always be cautious and ensure you’re only doing this for trusted files and sources. Happy gaming from Repack Guru, and stay safe!
Disclaimer: This guide is intended for educational purposes only. Repack Guru does not endorse disabling antivirus software without proper precautions. Always verify the safety of files and re-enable your antivirus as soon as possible.